Photography for the clinician - how to take good clinical and dermoscopic photographs
LAST UPDATED: Jan 30, 2024
Acknowledgements: I would like to thank Dr Chin Whybrew for writing this chapter
Introduction
This chapter on how to take good photographs is set out as follows:
Management
Videos
The information below provides advice on how to take a good clinical photograph. The following videos provide advice on how to take good clinical photographs, dermoscopic photographs, and how to use the Pando App to transfer images from a mobile phone to the computer:
Clinical photographs - getting ready
-
You can use a phone camera or digital camera - refer to the BAD guidelines on use of mobile phone cameras for clinical photography
-
Make sure that the dermatoscope and the camera or phone are charged
-
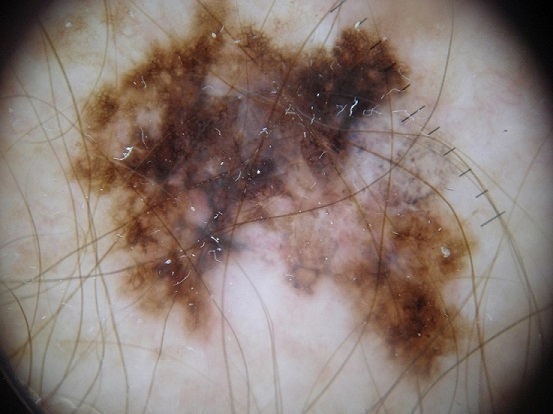
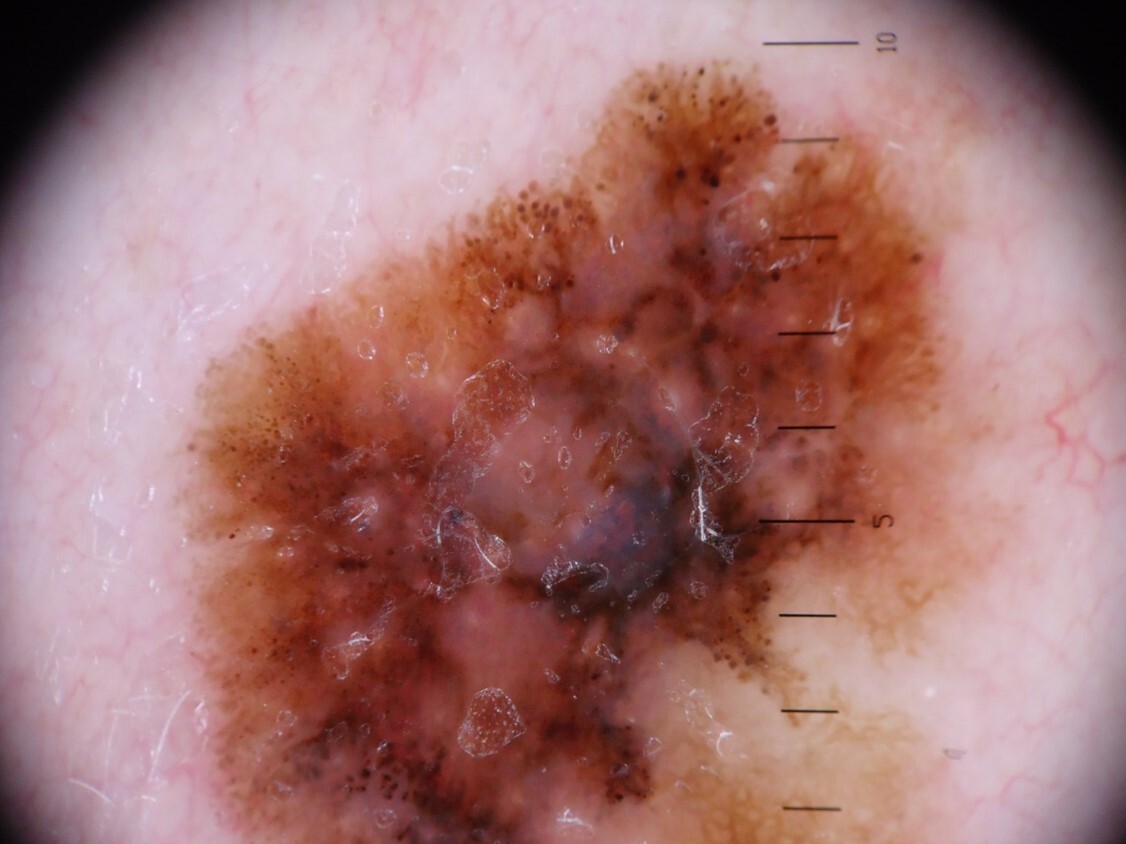
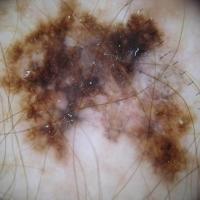
Make sure the end plate of the scope is clean and free of dust (on both sides if it is a removable end plate) - in figure 1 dust on the end plate is clearly visible in this dermoscopic photo of a melanoma
-
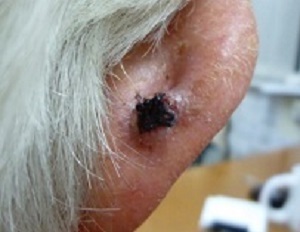
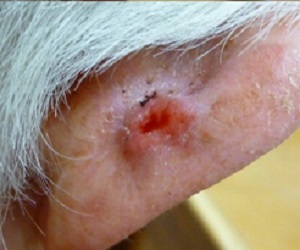
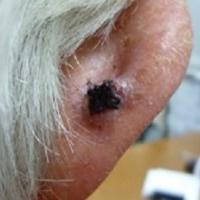
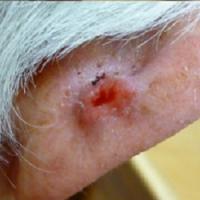
Remove any surface crust or scale from the lesion, either with a damp cloth, or by tape stripping (apply opaque sticky tape to the lesion, remove it, repeat until the tape comes away clear). Sometimes an adherent crust or scale needs softening with emollient before it can be removed, it is preferable to do this first. Urea based emollients can be helpful to remove surface scale. Figure 2 - crust and scab obscure the lesion, figure 3 - once the crust has been removed we can see what lies beneath
-
Make sure you have the patient’s consent - verbal consent is fine if you are only using the photo for their direct medical care, but if using photos for any other purposes (eg teaching) then a consent form should be used. You should always inform the patient that the photos will be stored in their clinical record, and ideally show them any photos before uploading them
Taking the clinical photo
Always take at least 2 clinical photos for each lesion, in addition to the dermoscopy photo:
- An orientation photo: stand 1 metre away from the area of interest and take the photo. This shows where the problem is and how big an area it covers - if making a referral this can help the specialist decide if the lesion is small enough to excise with a simple ellipse, or if it may need a skin flap/graft
- A close-up photo: move your camera 10-12cm from the skin problem. On most phones you can touch the part of the screen you want the camera to focus on. If you get too close, the camera won’t be able to focus. The focus is the most important thing - don’t worry about getting really close, as close as you can get in order to achieve a sharp focus is all you need. For the close up photo, it is usually better to have the light source coming slightly from the side, to highlight any change in skin texture
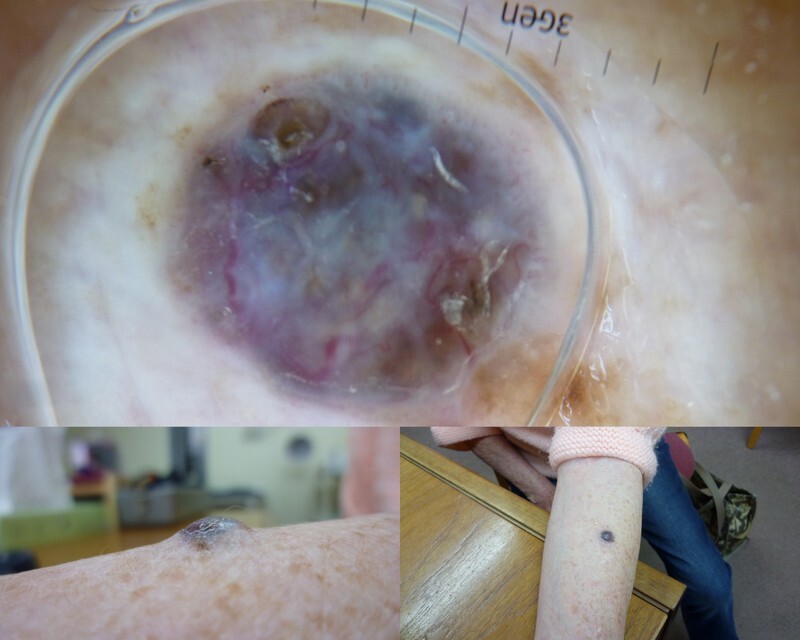
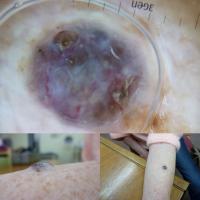
- A sideways on photo is needed for a raised lesion: if the lesion is raised then a sideways on photo is very helpful (figure 4)
Clinical photography in skin of colour
Photographing skin of colour requires a slightly different approach, but is still easily done if you remember a few, simple tips:
- Use natural light where possible - flash tends to produce poor results, often creating artifacts on the photograph
- If natural light is inadequate, room lights are the next best option but can alter the colour balance of the picture
- Use indirect light, rather than direct lighting sources
- In photographing skin of colour, the ideal light source should come from all sides of the subject, but this is rarely achievable in practice
- Avoid brightly coloured or patterned backgrounds to reduce distraction and to minimise colour contamination of the subject
- Ideally use a separate light for hair, lit from above
- Consider the use of a polarising filter, or parallel polarised light - if available. This helps to reduce reflectance and glare."
- For more detail refer to this document
Dermoscopy photo tips
-
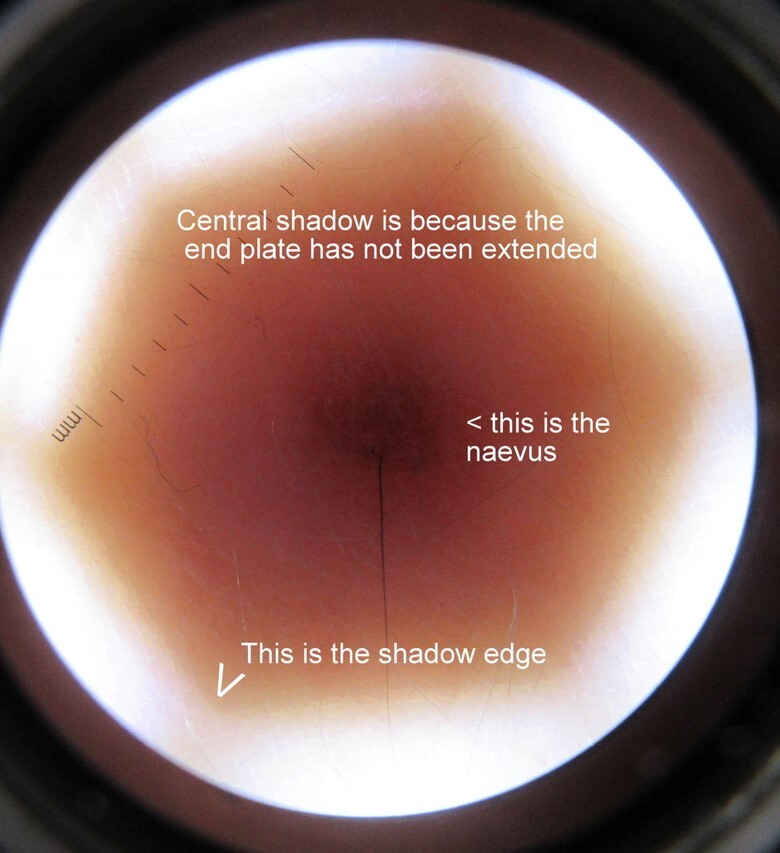
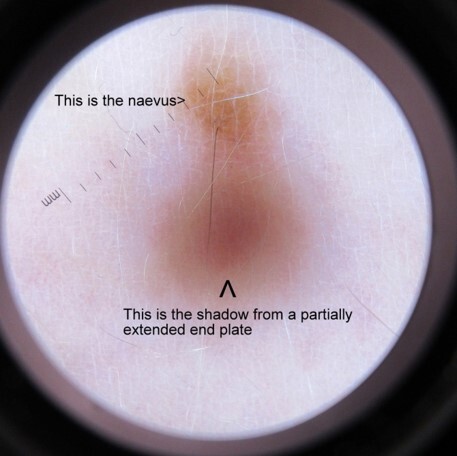
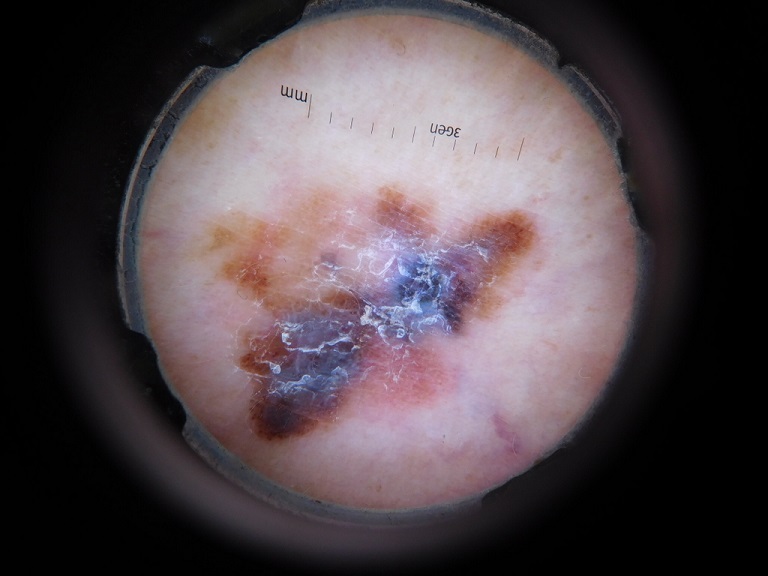
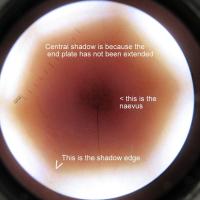
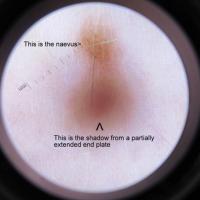
Focus the scope before attaching the camera. Some scopes have a little notch to show how far out to extend the end plate for a perfect focus on a flat lesion. If you see a shadow over the lesion when using the scope this is because you have not extended the end plate - in figure 5 the shadow is because the end plate is not extended at all, in figure 6 the shadow is because the end plate is not extended enough
-
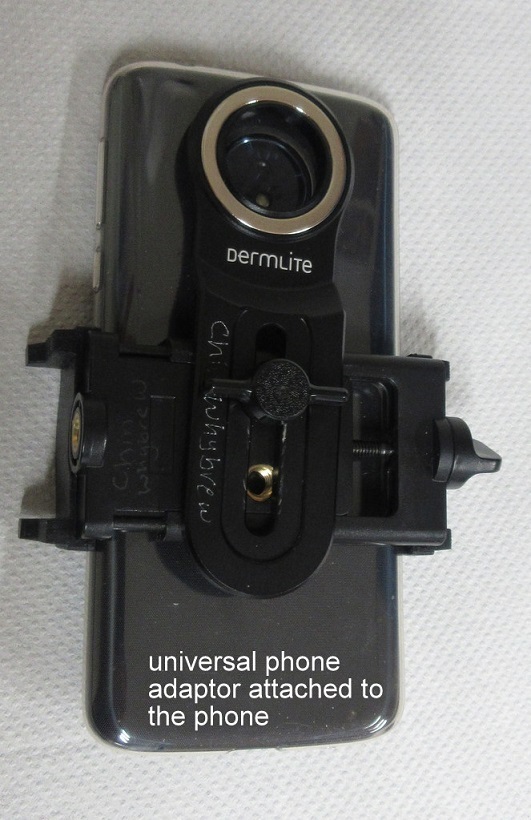
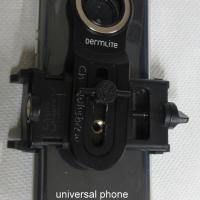
If you have an adaptor to attach the camera it makes things easier. However, you can hold the camera up to the eyepiece without an adaptor. If you are not using an adaptor you may need to get the patient to hold the scope still, so you have two hands free to work the camera or phone. Modern adaptors are magnetic and very easy to use. Figure 7 shows an example of a universal phone adaptor with a magnetic ring to attach the scope
-
If using a phone camera without an adaptor it is important to make sure the phone is level compared with the scope. If it is on an angle it will be impossible to focus
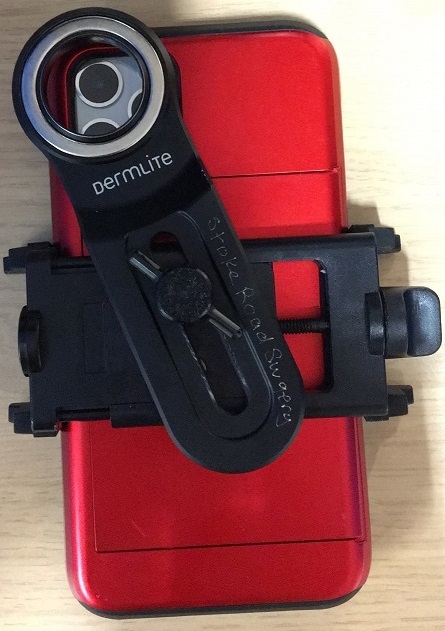
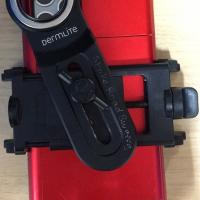
- If your phone has multiple cameras, first attach the adaptor to the phone using the main cradle, but leave the other part (the arm) loose. Attach the scope to the (loose) arm and put the scope on your trousers (look at the weave on the fabric!), and get the scope lined up with the camera by trial and error. By wiggling it around, you’ll find out how to centre it. Then tighten up the screw to hold the arm in place, so you can use it on the patient (figure 8)
-
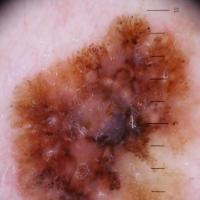
Always use liquid interface when taking photos. If you remove the scope then put it back on again always wipe off the contact fluid and reapply it, otherwise you will get bubbles in the picture (figure 9)
-
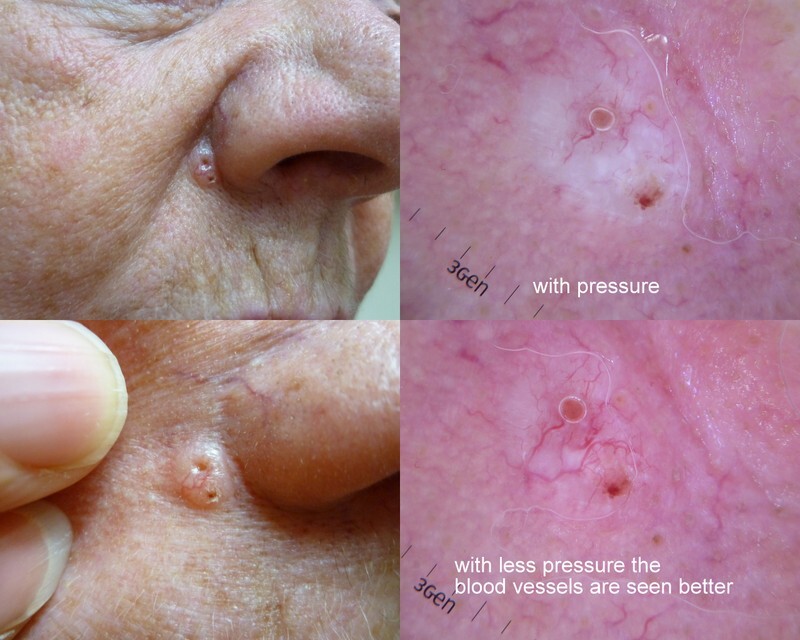
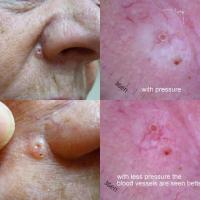
Don’t press too hard or you may compress the blood vessels. Try using a more viscous contact fluid, eg lubricating jelly rather than alcohol gel - figure 10 highlights the effects of pressure
-
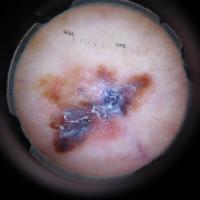
Before taking the photo, zoom in with the camera to remove as much of the black circle at the edges as possible while still being able to see the lesion. If you don’t zoom the camera in you get a black border around the photo (figure 11)
-
Try to get the measuring graticule (if the scope has one) in the shot
-
Make sure to focus the camera before taking the photo. On a digital camera you normally need to press the button part way down to focus, then all the way down for the photo. On a phone, tap the screen at the point you want the camera to focus – some phones will find it difficult to autofocus on dermoscopy pictures
-
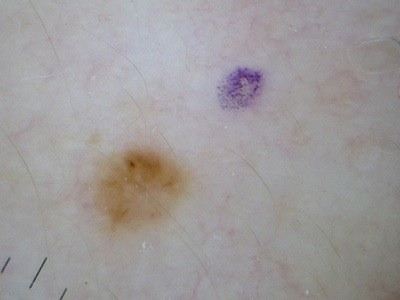
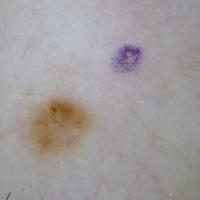
If your camera will not focus on the lesion this may be because it is zoomed in too far - try zooming out a bit. Sometimes it is because there is not enough contrast for the autofocus to pick it up. Try taking the scope off, removing the liquid interface, putting a small ink dot on the skin near the lesion with a pen, then reapplying it. The camera should be able to focus on the ink dot (figure 12)
-
It is often helpful for the patient to have a dermoscopy photo on their phone. This is particularly when monitoring lesions, so that when they are seen at subsequent appointments a previous (date stamped) dermoscopic photo is always available to the clinician who sees them
-
Take a few photos and only send the best. Check that the skin problem is in focus and easy to see. The skin lesion or rash needs to look the same on the screen as it does in real life. If you know the photo has not worked, and it is blurry or doesn’t give a true picture of the lesion, then don’t send it
Sending the photo
-
Only send the best photos of each skin lesion, as above
-
Make sure the picture file size is between 500Kb and 1Mb
-
If you have the photo saved on your desktop, you can open it in “paint” (on all Microsoft computers) and click on “resize”. This lets you choose a percentage. 20% is usually about right, but you can check what the file size has been changed to by saving it, and then hovering over the icon or file name on your desktop
-
If you took the photo on your phone (outside of an app) then you may be able to choose the file size when emailing it to yourself (refer to the BAD guidelines above if doing this)
-
If you took the photo within a dedicated app (this is the best way to do it when using a phone), then most of the apps will automatically resize the photo for you. There are many different apps available. One example in the UK is Pando (which is free to use but you need a nhs.net email to do so)
Additional images
1
2
3
4
5
6
7
8
9
10
11
12
Disclaimer - the author PCDS cannot accept responsibility for any misleading or incorrect statements, and the management of individual patients remains the direct responsibility of the individual doctor. We do however hope that visitors to this site can contact us regarding comments that are considered misleading or incorrect so that we can continue to improve the site.
Image Rights - The PCDS would like to thank Dermatoweb, DermQuest (Galderma), and others who have contributed images. All named individuals and organisations maintain copyright for the relevant images.